
Like any good adventurer, or any good cook for that matter, I love cooking in, on, and around cast iron. Not so much “around” it, because that’s pretty useless. I just wanted to round out my preposition series.
Until recently, the only cast iron in my possession has been a 10″ chicken fryer. Sure, I can bake casseroles, cakes, and fry….well, chicken, in it, but it’s a somewhat limited piece of cookware. When my grandmother passed away in August, I managed to come home with some righteously old school, high quality cast iron. I got a 3″ egg pan and an 8″ frying pan. The only problems were that they had decades of food build-up and starting rust.
I’m sure we’ve all seen pans in these conditions at garage sales or secondhand stores and passed them up because they were “worthless”, but you will not be so foolish anymore after reading this!
These two pans, along with the chicken fryer when I received that one as well, have all been refurbished in the exact way. If you do a little google searching, you will find tons of information on the subject. In fact, that’s where my dad got his information so I’m not claiming this to be a definitive source. I’m just saying we’re (mostly, “he’s”) batting 100% on refurbishing more than 6 pieces of cast iron.
Oddly, this is a lot of fun too. You take a nasty, black, food-crusted, dried out, rusty piece of cast iron and transform it into something nearly brand new. Let’s get cookin’! (Did you catch the pun?)
De-Gunking your Cast Iron
First, grab a beer and start a campfire. Then, drink a second beer as you build up a nice base of coals. Once you’ve got decent flames and decent coals, throw the cast iron right on in. Yes, that’s right. Throw your cast iron in the fire. This will burn off all the previous seasoning, excess grease, and food build-up. You can see on the right where the pan has actually started on fire because of that nastiness.
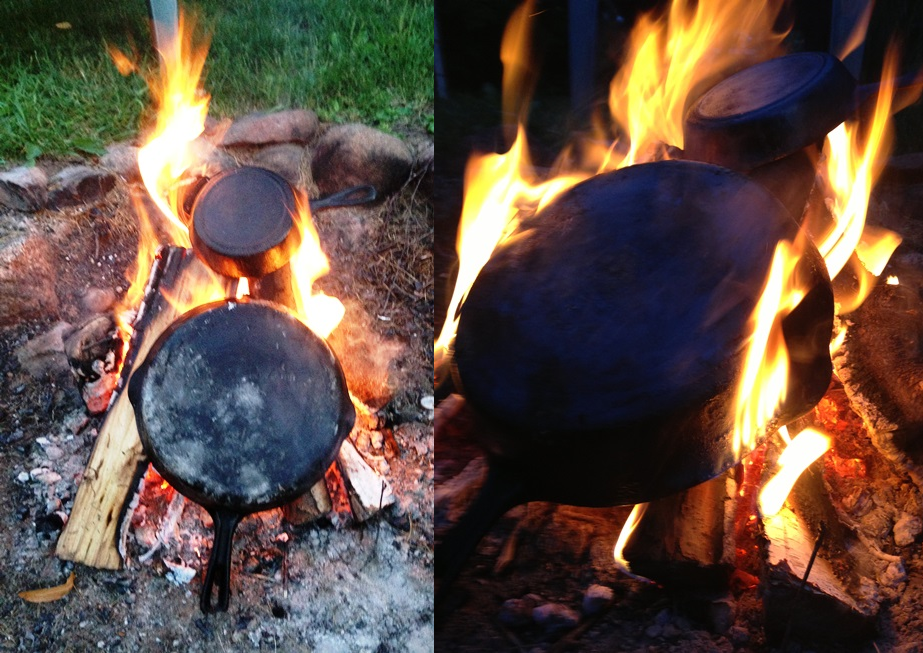
If you’ve got a good fire and good coals, it should only be in for around 30 minutes. Any more and you may end up warping your cookware. Es no bueno. And speaking of warping, these pans may very well be cherry red as you’re taking them out. First of all, please don’t grab them with your hand. Jesus. Secondly, use utensils like shovels and sticks and anything else that isn’t your hands, but be very careful not to drop them on a hard surface. Again, cherry red metal deforms easily. Thirdly, don’t cool them ultrafast. Not only could that causing warping too, but you could actually crack your cast iron too. And then it’s really worthless.
What we do is keep them in the fire pit, but pull them off to the side. Then after awhile, put them up on the grass closest to the fire. And finally, pull them away so they can fully cool.
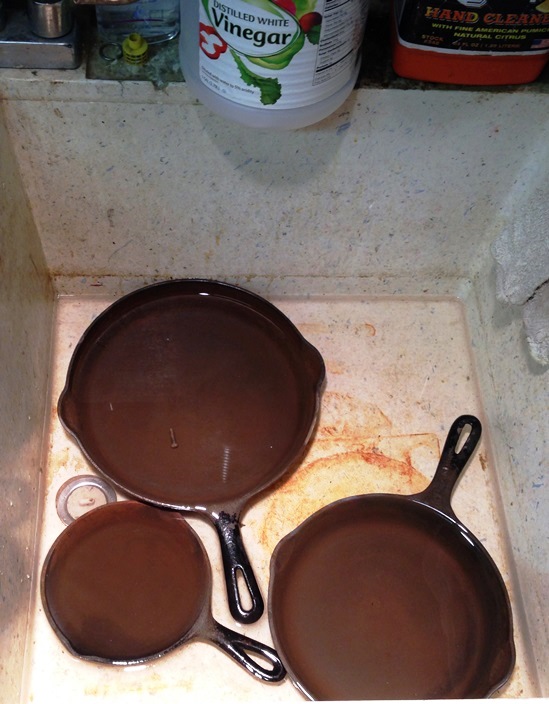
When you’re done in the fire, you should easily be on your 3rd or 4th beer, and your cast iron pans should look like this:

And now you might be thinking: “OMG WTF?!?!” Translated, that means: “Oh my, this is worse than when I started. Whatever shall I do?”
Don’t worry, this is where it starts to get awesome.
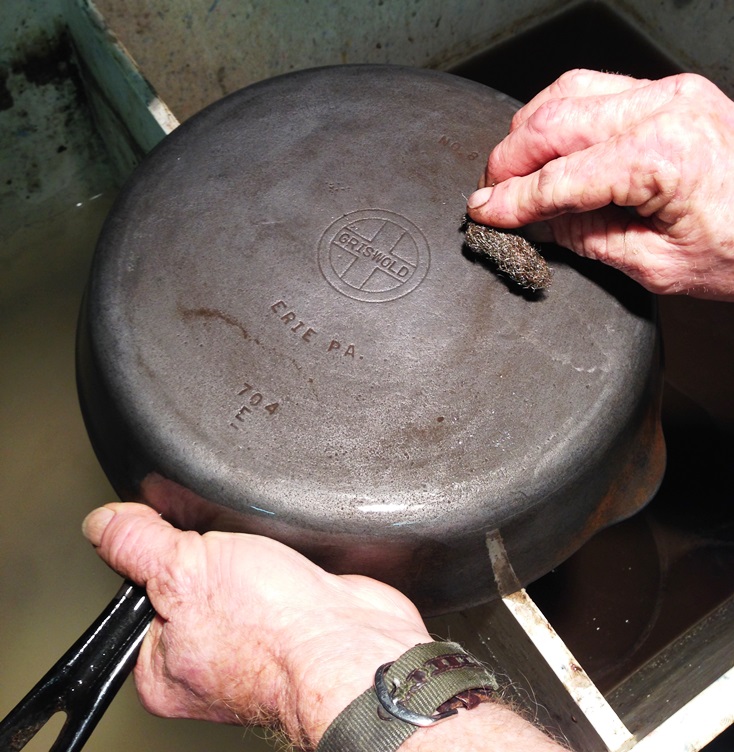
All that brown and white crusty stuff is all the previous gunk that still on the pan, but no longer attached to the metal. Put some gloves on, wear a mask, and take some steel wool to the cast iron. Most of it should all flake off pretty easily. For the most part, the metal should feel smooth to the touch, even if it is still discolored and rusty in places.
Next, mix a tub or utility sink or any other liquid holding vessel with one part white vinegar and one part water. i.e. 1/2 gallon of vinegar, 1/2 gallon of water…or whatever it takes to completely submerge your cast iron in the mixture.
Let it soak as long as needed until the rust spots all disappear, but NO LONGER THAN 4 HOURS. (I wasn’t yelling, that just needed to be emphasized.) After 4 hours, the vinegar can actually start to damage the cast iron. (You can gently rub the rust spots with steel wool again to see if they’re gone or if they need to soak longer.)
Once you think the rust has all disappeared, get out your gloves, mask, and trusty steel wool one last time. Give your cast iron a good working over with the wool, and don’t be afraid to take a new piece of steel wool if yours is getting dull/wearing out. This is the last chance for you to get all of the gunk and rust off your pans. They should really start looking new again after this.
Rinse your pans thoroughly with water, do a quick dry with a towel, and then get them in a hot oven to evaporate the remaining water. If you know what you’re doing and watch closely, you could also do the final evaporation over a gas burner too. The key here is to not let them stay too dry too long without a protective layer of grease. Without that layer, NEW rust will literally begin to form right in front of your eyes. Es no bueno.
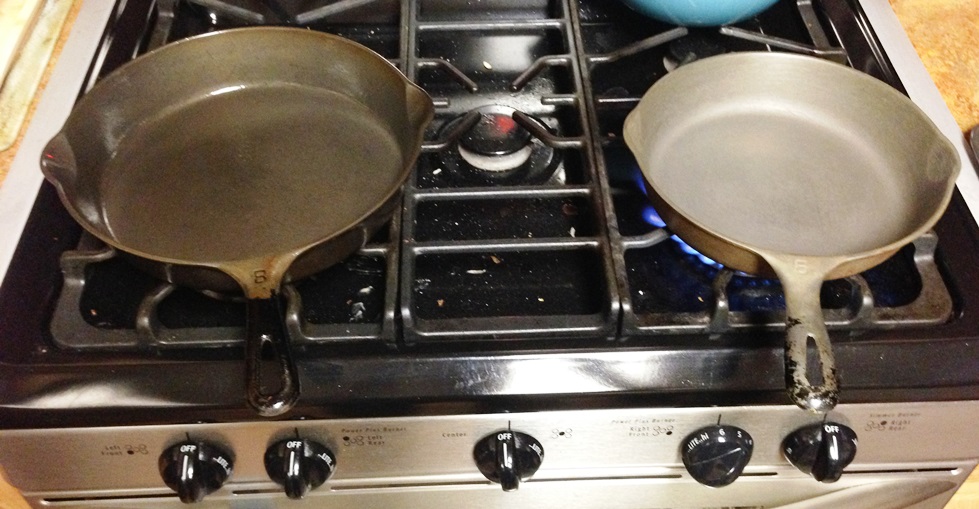
Since we’ve done this a couple of times and the oven was being used for baking Thanksgiving Goodness, we opted for the burner route. Some things to note about this picture:
-
Look how sparkly and new they look compared to when we took them out of the fire!
- The pan on the left already has its first coating of grease, waiting to be seasoned.
- The pan on the right is just finishing drying. The grease was added immediately after the picture.
Seasoning Your Cast Iron Cookware
To do this, coat the entire pan – front, back, top, bottom, side-to-side, underneath, over-the-under, and all the other prepositions you can think of – with a high smoking point cooking grease or oil. We like Crisco or peanut oil, but I’m sure you could find something to your liking if you have something against those.
Now, “coating” doesn’t mean, “leave it a sloppy, dripping mess.” You can coat everything easily and nicely without being obnoxious. Use a paper towel to remove the excess, and there will still be enough on the cast iron to season it properly.
Once coated, pop it in the oven, or a regulated gas grill outside, set around 350 degrees F for about an hour. If you’re using your oven, put some tinfoil underneath to catch the excess grease drippings. Or don’t. Totally up to you. This may also smell up your house a little so it’s really nice if you have a big enough gas grill out your back porch.
For the best results, season your cast iron 2-4 more times before you use it again for the first time. Or if you’re impatient like me, just make sure you cook some really greasy food (like BACON) over low heat the first couple of times.
And there you have it, brand new cast iron cookware. So get out there and rummage through the garage sales! Es muy bueno!


this rocks, D…. but I’d like to see a photo of the mask you wear during the process 🙂
Thanks! And, d’oh! That’s one selfie I forgot to take.
Great write up – thanks! love my cast iron stuff
It’s the best! I just wish I didn’t have an electric stove. Cooks much better over gas. Oh well…
Are you a magician?! This seriously rocks. So stoked to fix up a cast iron dutch oven that I thought was done for.
If I were a magician, I would use my powers for evile.
And if you’re antsy to fix up your Dutch oven, but don’t have access to a fire, there are other methods found on the “www” that don’t require incinerating it. We just haven’t tried them.
I have 2, spiders, as my mother called them, and I use oven cleaner on them, and just rinse-off, and spray cooking spray on them. Every time I use the oven, I just leave them in , while the oven is on, and when I need them , they are already seasoned, of course I wipe them down every time with paper towel, after using them on the stove, and also scrape-off any residue from frying.
My biggest challenges were my two antique cast iron waffle irons. I found that using a cheap metal-bristle brush was the trick to getting in all the little crevices. I got them both, rusty and crusty, from jumble sales. Now, they make the Best Waffles Ever!
I was wondering if it would be suitable to throw cast iron in a self-cleaning oven for five minutes when it needs cleaning? I had a person that deals in selling 2nd hand stoves, tell me when your cleaning your oven, only turn on for five minutes, you don’t have to leave it on any longer, even though the electric stove direction tells you to leave at the high heat for an hr, not necessary. I tried it and it worked, all cleaned in five mins. Do,I dare to try out the cast oven cleaning- up of it also…. TY for sharing your cleaning experience with us….